 Recently, I had to replace the battery on my car from leaving the interior car lights on overnight. Below are instructions on how to choose the appropriate battery and how to replace it.
Although the pictures are specific to my Honda Odyssey, this is a basic guide on how to change a car battery that can be used on any car.
Steps to picking out the right battery:
Once you arrive at a store that sells car batteries you should be able to find a manual/booklet (as seen in the pictures below) which will identify the appropriate battery for your car.

Open the book to the page with your Make of car; look down the columns until you find your Model.
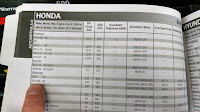
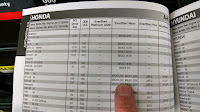
Note: Make sure you look up your car by model and DATE. The battery options may vary based on the date and model of your specific car.
After you have found your car, move across the row and find your battery options. Usually, several different battery options will be available. Although the original Honda battery had 550 cold cranking amps, I chose an upgraded model with 750 cold cranking amps.
Now that you have your battery you are ready for the installation.
Steps to changing the battery:
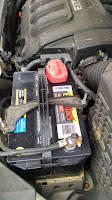
3: Location
Find your battery. In most vehicles, the battery is located under the hood in the engine compartment. Some manufacturers place the batter in other locations, such as the trunk.
Your owner manual should tell you where to find your battery if it is not visible in the engine compartment.
2: Positive and negative.
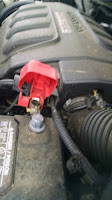
Note the location of the positive (red) and negative (black) cables. The positive (red) will usually have some sort of cover (often red) and be labeled (+).
In this picture the positive cable has a red plastic cover and the negative connector is unmarked.
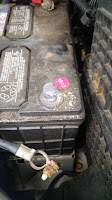
3: Negative
The first step is to remove the negative cable. You can do so with a wrench. Simply loosen the bolt and lift off the cable.
4: Positive
Lift the cover on the positive cable and loosen the bolt. Then remove the positive cable.
WARNING: Be carfare not to place metal objects across battery posts. Car batteries are explosive.
5: Retention system
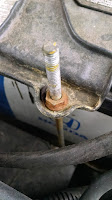
Remove the retention system. It will be different for some cars, but on my Honda I just had to loosen the two bolts on either side and then lift the retention system out of the car.
6: Removal
Lift the battery from the car being sure not to bump the battery on other parts.
Many batteries have a carrying handle. Use this handle to help lift the battery from the car.
7: Installation
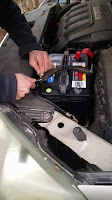
Now place the new battery in to the same location as the old battery.
 8: Direction
Make sure the battery is oriented in the correct direction so that the positive is on the same side as was the old battery.
9: Retention
Reinstall the retention system. Make sure that bolts are tight to ensure that battery does not move around.
10: Positive
Reattach the positive cable. Be sure you attach the positive cable to the positive post marked with a (+) on the battery. Tighten the bolt. Wiggle the cable to ensure it is firmly attached.
11: Negative
Attach the negative cable and tighten the bolt. Wiggle the cable to ensure it is firmly attached.
Note: Be sure to return your old battery to the same store where your purchased the new battery for recycling. You will also get some money refunded, known as a "core charge" for returning your old battery. The amount may vary from store to store but is usually $10-$15.
This project is complete! Start your engines!!!
Thanks for reading!!
>> Be sure to check out my other posts for more helpful tips and instructional. <<
No comments:
Post a Comment